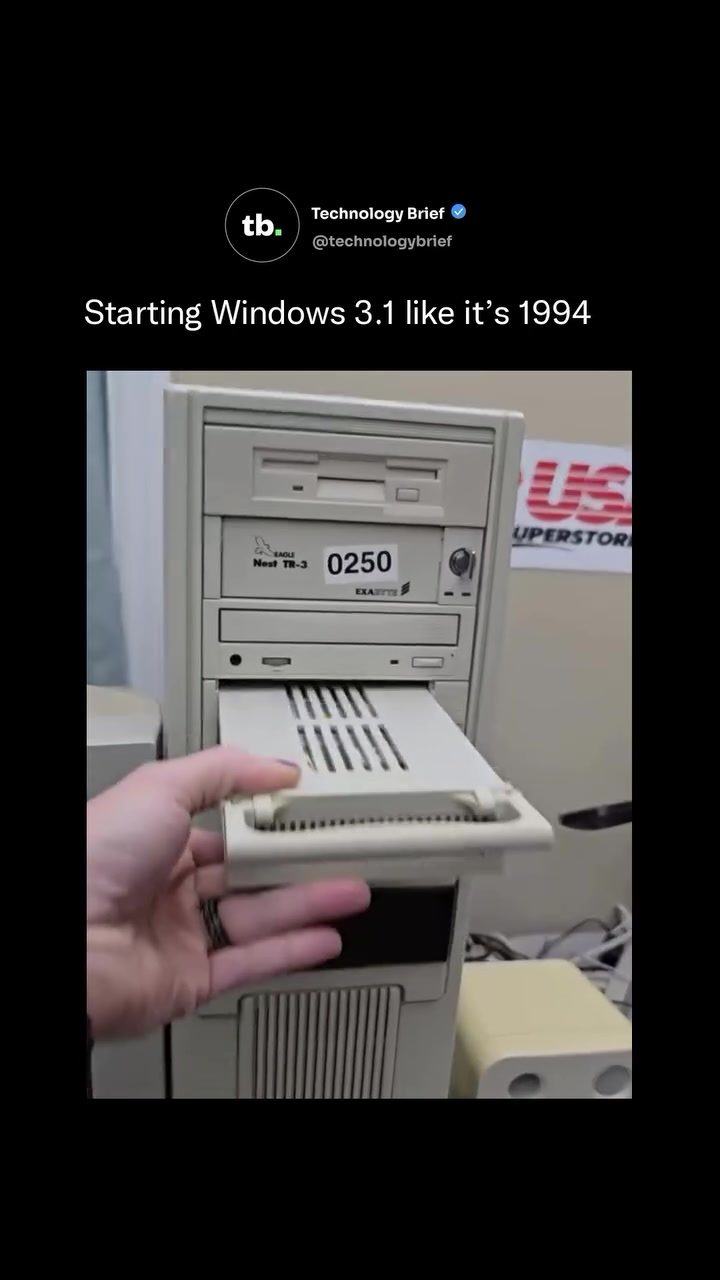
Vintage Computer Startup: Booting Up Windows 3.1
Booting up an old computer can be a journey through time, especially when it involves a vintage NEC desktop running Windows 3.1. This process is a vivid reminder of the early days of personal computing, when machines like the Intel 486 DX2 PC were the pinnacle of home and office technology. The startup sequence of such a system is a fascinating blend of nostalgia and technical intricacy.
Context: Why This Matters
Understanding the startup process of a vintage computer like the NEC desktop running Windows 3.1 provides insights into the evolution of computing. This era marked a significant shift from text-based interfaces to graphical user interfaces (GUIs), paving the way for the modern computing experience we know today. The hardware and software components of these vintage systems offer a unique perspective on how far technology has come and how it has shaped our digital landscape.
Main Discussion
The Booting Process
The booting process of a vintage NEC desktop begins with a BIOS memory check. The AMI BIOS checks the system's hardware components, ensuring everything is in working order. This step is crucial for the stability and functionality of the system. Once the BIOS check is complete, the machine loads MS-DOS, a command-line operating system that was the backbone of early computing.
Loading Drivers
After MS-DOS is loaded, the system begins to load a suite of drivers. These drivers are essential for the computer to communicate with its hardware components. The NEC desktop showcased in the video is fitted with several high-end components for its time, including a Creative Sound Blaster Vibra 16 sound card and a Mitsumi CD-ROM drive. These drivers are loaded along with MS-DOS, enabling the system to recognize and utilize these peripherals.
The Command Prompt
Once all the necessary drivers are loaded, the system lands at the command prompt. This is where the user can interact with the computer using textual commands. The command prompt was the primary interface for users before graphical interfaces became prevalent. From here, the user types 'win' and hits Enter to launch Windows 3.1.
Windows 3.1: The Graphical Shell
Windows 3.1, released on April 6, 1992, was not a standalone operating system but a graphical shell that sat on top of MS-DOS. This shell introduced several groundbreaking features that became staples of all subsequent Windows versions. TrueType fonts, drag-and-drop functionality, the Windows Registry, and iconic games like Minesweeper and Solitaire were all part of Windows 3.1. These features made computing more accessible and user-friendly, marking a significant shift from the text-based interfaces of the past.
Hardware and Software Integration
The NEC desktop is equipped with various high-end hardware components typical for a home or office machine of the era. The Creative Sound Blaster Vibra 16 sound card provided high-quality audio, while the Mitsumi CD-ROM drive allowed for faster data access. An Exabyte tape drive was also included, offering a reliable backup solution. Additionally, the system runs CuteMouse, a free DOS mouse driver still actively maintained decades after MS-DOS was retired, highlighting the longevity and community support for these vintage systems.
Practical Tips
Preserving Vintage Hardware
For enthusiasts looking to preserve and use vintage hardware, here are some practical tips:
- Regular Maintenance: Clean the interior of the computer regularly to prevent dust buildup, which can cause overheating and component failure.
- Backup Drivers and Software: Always keep backups of all necessary drivers and software. This ensures that you can reinstall them if needed.
- Use Compatible Hardware: When upgrading or replacing components, ensure they are compatible with the vintage system to avoid compatibility issues.
- Community Support: Engage with online communities focused on vintage computing. These forums are invaluable for troubleshooting, finding replacement parts, and sharing knowledge.
Running Modern Software on Vintage Systems
While vintage systems like the NEC desktop running Windows 3.1 are limited in what they can run compared to modern computers, there are ways to bridge the gap:
- DOSBox: This is an emulator that allows you to run DOS and older Windows games and applications on modern systems. It can also be used to run DOS applications on vintage hardware.
- Virtual Machines: Setting up a virtual machine with an older operating system can allow you to run vintage software in a controlled environment. This is particularly useful for software development and testing.
Connecting to Modern Devices
Connecting vintage hardware to modern devices can be challenging due to differences in technology. However, there are adapters and converters available that can help bridge this gap. For example, USB to serial adapters can allow modern laptops to communicate with vintage computers that use serial ports.
Important Takeaways
- The Windows 3.1 graphical shell revolutionized the way people interacted with computers, introducing features that remain staples today.
- Vintage hardware like the NEC desktop running Windows 3.1 offers a unique glimpse into the past and the evolution of computing.
- Preserving and maintaining vintage systems requires regular maintenance, community support, and compatibility awareness.
- Modern tools and adapters can help bridge the gap between vintage and modern computing, making it possible to run legacy software and hardware.
Conclusion
Booting up a vintage NEC desktop running Windows 3.1 is more than just a trip down memory lane; it's an immersion into the technological foundations of modern computing. From the BIOS memory check to the command prompt, each step of the startup process tells a story of innovation and progression. Whether you're a vintage computing enthusiast or simply curious about the roots of personal computing, experiencing this boot-up sequence is a journey through the history of technology. Embrace the nostalgia and appreciate the evolution that has led us to today's advanced computing landscape.
Questions readers ask
What is the initial process when booting up a 1990s NEC PC with Windows 3.1?
The startup sequence begins with the BIOS (Basic Input/Output System) performing a series of checks on the hardware components, such as the RAM, CPU, and storage devices. This phase ensures that all essential parts are functioning correctly before proceeding to load the operating system.
Why is MS-DOS involved in the Windows 3.1 booting process?
MS-DOS is integral to the Windows 3.1 booting process because Windows 3.1 is not a standalone operating system. It requires MS-DOS to manage the basic file operations and hardware interactions. The system initially loads MS-DOS, and then Windows 3.1 runs as a shell over MS-DOS.
What is the significance of the Sound Blaster Vibra 16 in a 1990s NEC PC startup sequence?
The Sound Blaster Vibra 16, a popular sound card from Creative Labs, is crucial for enhancing the audio capabilities of the NEC PC. During the startup sequence, the system loads drivers for the Sound Blaster card, enabling sound functionality for both the operating system and applications, creating a richer user experience.
How does the Mitsumi CD-ROM drive factor into the boot process?
The Mitsumi CD-ROM drive, if present, allows the PC to read data from compact discs. During the startup, the system loads the necessary drivers for the CD-ROM drive, enabling it to access software and data stored on CDs. This is particularly useful for installing new software or running applications directly from CDs.
What are the key differences between the BIOS checks of a 1990s NEC PC and modern systems?
The BIOS checks in a 1990s NEC PC are more basic and text-based compared to modern systems. They involve a series of beeps and on-screen text messages that indicate the status of hardware components. In contrast, modern systems often use more advanced UEFI firmware with graphical interfaces and detailed diagnostic messages.
Can a 1990s NEC PC running Windows 3.1 still be used for practical purposes today?
While a 1990s NEC PC running Windows 3.1 may not be suitable for modern tasks due to its limited processing power and compatibility issues, it can still be used for specific purposes. These include running vintage software, retro gaming, or as a nostalgic display piece. It can also serve as a learning tool for understanding the basics of early computer hardware and software.
Related deep dives
Similar reads based on topic and creator.




Recent articles
Fresh deep dives from the latest Reels we unpacked.



Comments
Be the first to comment.