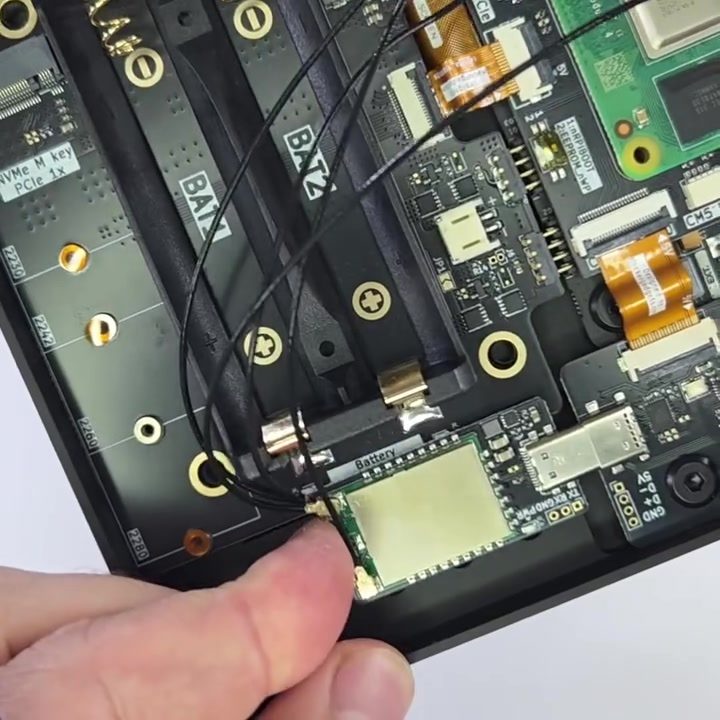
Internal Component Repair of a Computer Motherboard
Diving into the intricate world of electronics, repairing and understanding the internal components of a computer motherboard is a crucial skill for both hobbyists and professionals. A multifunctional tool like the uConsole with AIO v2 can be a game-changer for this task, allowing for precise and efficient repairs. The motherboard, often referred to as the backbone of a computer, consists of various components that work together to enable the system to function. Let's explore the key components and the repair process.
Context / Why this matters
Understanding and repairing a computer motherboard is essential for maintaining and upgrading your computer. Whether it's for personal use, professional work, or simply for the satisfaction of fixing something yourself, knowing how to handle the delicate components of a motherboard can save you time and money. By familiarizing yourself with components like the BAT1 and BAT2 labels, capacitors, resistors, and connectors, you can diagnose and fix issues more effectively.
Main discussion
Understanding the Motherboard Components
A motherboard is a printed circuit board (PCB) that houses the central processing unit (CPU), memory, and other essential components. It's the central hub that connects all the parts of your computer. Here are some key components you might encounter during a repair:
Capacitors and Resistors
Capacitors and resistors are fundamental components in any electronic circuit, including the motherboard. Capacitors store and release electrical energy, while resistors control the flow of electrical current. These components are vital for stabilizing voltage levels and protecting the motherboard from power surges.
Connectors
Connectors are used to link various components to the motherboard. These can include RAM slots, PCIe slots for graphics cards, and various other connectors for storage devices and other peripherals. Understanding which connector goes where and how to properly seat components is crucial for a successful repair.
BAT1 and BAT2
The labels BAT1 and BAT2 typically refer to battery connectors on the motherboard. These batteries often provide power to the CMOS (Complementary Metal-Oxide-Semiconductor) chip, which stores critical system settings such as the system time and date. If these batteries are faulty, the system might not retain its settings, causing issues like incorrect date and time or incorrect boot order.
The Repair Process
Repairing a motherboard involves several steps, each requiring precision and patience. Here’s a high-level overview of the process:
-
Diagnosis: Identify the problem. This could be anything from a faulty capacitor to a damaged connector.
-
Preparation: Gather the necessary tools and components. This might include a soldering iron, solder, tweezers, and replacement parts. The uConsole with AIO v2 is a multifunctional tool that can be incredibly useful for this purpose.
-
Disassembly: Carefully disassemble the motherboard, removing any components that might obstruct the repair. This might include the CPU, RAM, and other connectors.
-
Repair: Perform the repair, whether it's replacing a capacitor, soldering a connector, or replacing the BAT1 or BAT2 batteries.
-
Assembly: Reassemble the motherboard, ensuring all components are securely in place.
-
Testing: Power on the system and test to ensure the repair was successful.
Tools and Equipment
When it comes to repairing a motherboard, having the right tools is essential. Here are some must-have tools for any electronics repair kit:
- Multimeter: A device used to measure electrical properties such as voltage, current, and resistance. This is crucial for diagnosing issues.
- Soldering Iron and Solder: Essential for making and repairing electrical connections on the motherboard.
- Tweezers and Screwdriver: For handling small components and screws.
The uConsole with AIO v2 is a versatile tool that can serve multiple purposes, making it a valuable addition to your toolkit.
Practical tips
Safety First
Working with electronics can be dangerous if not done correctly. Always follow these safety tips:
- Ground Yourself: Use an anti-static wrist strap to prevent static discharge, which can damage components.
- Work in a Well-Lit Area: Good lighting is essential for precision work.
- Use the Right Tools: Ensure your tools are in good condition and suitable for the task.
Documentation
Keep thorough notes and documentation of the repair process. This includes taking photos before and after the repair, noting down any changes made, and documenting the tools and components used. This will be invaluable if you need to refer back to the repair in the future or if someone else needs to work on the same system.
Practice and Patience
Repairing a motherboard requires a steady hand and a lot of patience. Don’t rush the process. Take your time to ensure each step is done correctly. Practice on less critical components or old motherboards before working on a fully functional system.
Important takeaways
Repairing a computer motherboard is a complex but rewarding task. By understanding the key components and the repair process, you can effectively diagnose and fix issues. Always prioritize safety, use the right tools, and take your time to ensure a successful repair.
The multifunctional uConsole with AIO v2 is a versatile tool that can make the repair process more efficient. It can handle a variety of tasks, from soldering to testing, making it an excellent addition to your toolkit.
Knowing how to handle the delicate components of a motherboard can save you time and money, and it’s a valuable skill for anyone interested in electronics.
Conclusion
Repairing a computer motherboard is a detailed and meticulous process, but with the right tools, knowledge, and patience, it’s a task that can be mastered. Whether you’re a hobbyist or a professional, understanding the internal components and the repair process is invaluable. From the upturned BAT1 and BAT2 batteries to the intricate network of capacitors and resistors, each component plays a crucial role in the functioning of your computer. Investing in a multifunctional tool like the uConsole with AIO v2 can make the process smoother and more efficient. So, dive in, practice, and become proficient in the art of motherboard repair.
Questions readers ask
What are the key components of a motherboard that I should be familiar with for repairs?
Key components include capacitors, resistors, and connectors. Capacitors store and release electrical energy, resistors regulate current flow, and connectors facilitate communication between different parts of the computer.
How do I identify a faulty capacitor on a motherboard?
Faulty capacitors often show physical signs like bulging or leaking. You can also use a multimeter to test their capacitance and ensure they are functioning within the specified range. Additionally, a capacitor tester can be a handy tool for this task.
Can I replace capacitors and resistors on a motherboard myself?
Yes, with the right tools and some practice, you can replace capacitors and resistors. Ensure you have a soldering iron, solder, and a desoldering tool. Follow a reliable repair tutorial and work in a well-ventilated area to avoid inhaling fumes.
What tools are essential for repairing motherboard connectors?
Essential tools include a multimeter for testing connectivity, a soldering iron for making repairs, and tweezers for handling small components. A tool like the uConsole with AIO v2 can also simplify the process by providing a comprehensive set of features for precise repairs.
How can I troubleshoot motherboard problems effectively?
Start by visually inspecting the motherboard for any obvious damage or burnt components. Use a multimeter to check for continuity and proper voltage levels. Consult a motherboard troubleshooting guide for specific error codes and symptoms, and isolate the problematic component before attempting a fix.
What should I do if I can't find a replacement for a specific motherboard component?
If a specific component is hard to find, consider checking online marketplaces or contacting the manufacturer directly for replacement parts. Another option is to look for compatible components from other motherboards, but ensure they have the same specifications to avoid compatibility issues.
Are there any safety precautions I should take when repairing a motherboard?
Always work in a static-free environment to prevent damage to the components. Disconnect the power supply before starting any repairs and avoid touching any metal parts while handling the motherboard. Additionally, wear safety glasses and work in a well-ventilated area to protect yourself from harmful fumes.
Related deep dives
Similar reads based on topic and creator.




Recent articles
Fresh deep dives from the latest Reels we unpacked.




Comments
Be the first to comment.