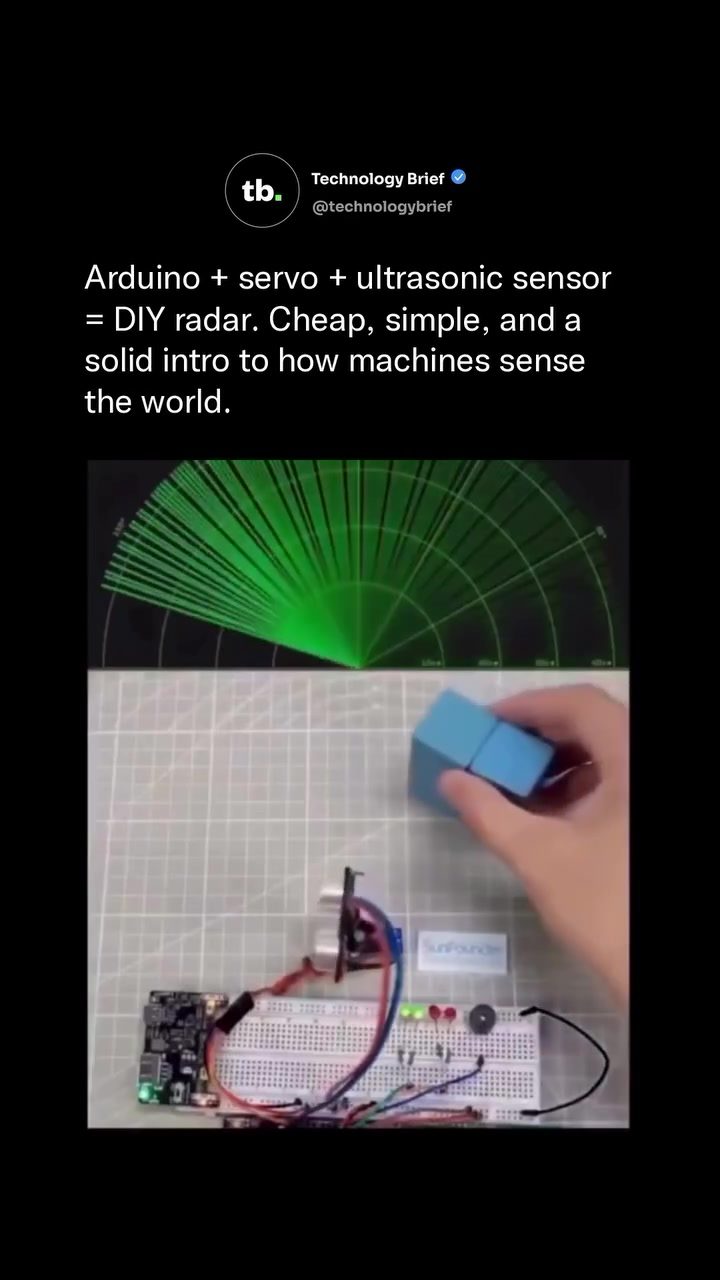
DIY Radar Project Using Arduino and Ultrasonic Sensor
Building a DIY radar system can be an engaging and practical way to understand how machines sense their surroundings. This project, developed by Technology Brief, uses an Arduino, servo motor, and ultrasonic sensor to create a functional object-detection system. The setup is straightforward and cost-effective, making it an excellent introduction to the principles of machine sensing.
Context / Why This Matters
The ability to detect and measure the distance of objects is fundamental in various applications, from automotive parking sensors to robotics. DIY radar projects provide a hands-on way to explore these concepts, making complex technologies accessible and understandable. By using readily available and inexpensive components, anyone with basic electronics knowledge can create a working radar system. This not only demystifies the technology but also encourages innovation and experimentation.
Main Discussion
Components and Setup
The DIY radar project utilizes a basic breadboard, an ultrasonic sensor, a servo motor, and a handful of LEDs. The Arduino acts as the brain of the system, controlling the servo motor and processing data from the ultrasonic sensor. The ultrasonic sensor emits sound pulses that bounce off nearby objects and return as distance readings. The servo motor sweeps the sensor back and forth across a 180-degree arc, creating a scanning pattern.
The radar display on a computer screen visualizes the data in real-time, using red lines to indicate detected objects and green lines to show clear paths. This visual feedback is crucial for understanding how the radar system operates and for debugging any issues.
How It Works
The ultrasonic sensor operates on a simple principle similar to how bats navigate. It sends out a sound pulse and measures the time it takes for the echo to return. This time delay is then converted into a distance measurement. At the speed of sound, even a few milliseconds of difference can translate into centimeters of distance, providing precise object detection.
The Arduino processes these distance readings and communicates with the servo motor to adjust its position. The servo motor, in turn, sweeps the ultrasonic sensor across the scanning area, creating a comprehensive map of the environment. This data is then fed into a real-time radar display, where the user can see the results visually.
Practical Tips
Choosing the Right Components
- Arduino: Opt for an Arduino Uno or similar model, as it is widely supported and has ample resources for troubleshooting. Ensure you have the necessary programming skills or access to tutorials to write the code for the Arduino.
- Ultrasonic Sensor: The HC-SR04 is a popular choice due to its accuracy and affordability. It is easy to integrate with the Arduino and provides reliable distance readings.
- Servo Motor: A standard micro servo motor with a 180-degree range is sufficient for this project. Ensure it is compatible with the Arduino and has enough torque to move the ultrasonic sensor smoothly.
- Breadboard and Wires: A standard breadboard and jumper wires are essential for connecting the components. Make sure to use high-quality wires to avoid signal interference.
Programming the Arduino
The Arduino code for this project involves reading the ultrasonic sensor data, controlling the servo motor, and sending the data to the computer for visualization. You can find various tutorials and sample codes online to help you get started. The key is to ensure the servo motor sweeps smoothly and the ultrasonic sensor readings are accurate.
Visualizing the Data
The real-time radar display requires a bit of additional software. You can use a serial plotter or write a custom program in a language like Python to visualize the data. The display should clearly show the red and green lines, indicating detected objects and clear paths, respectively.
Important Takeaways
- Cost-Effective: This DIY radar project costs a fraction of what professional proximity sensors run, making it an accessible option for hobbyists and students.
- Practical Learning: Building and experimenting with this radar system provides a solid introduction to how machines sense their surroundings, bridging the gap between basic coding and real hardware.
- Versatility: The principles used in this project are applicable to various fields, including robotics, automotive systems, and environmental sensing.
- Community Support: Open-source platforms and communities like Technology Brief offer step-by-step kits and resources, making it easier to replicate and customize the project.
Conclusion
The DIY radar project using an Arduino, servo motor, and ultrasonic sensor is a fantastic way to explore the fundamentals of object detection and machine sensing. By using affordable and readily available components, this project demystifies complex technologies and encourages hands-on learning. Whether you are a hobbyist, student, or professional, building this radar system offers a practical and engaging way to understand how machines sense their environment.
Questions readers ask
What components do I need to build a DIY radar with Arduino?
To build a DIY radar with Arduino, you will need an Arduino board, an ultrasonic sensor for distance measurement, a servo motor for rotation, and some basic wiring components like jumper wires, breadboard, and a power supply.
How does the ultrasonic sensor work in this project?
The ultrasonic sensor emits sound waves and measures the time it takes for the echo to return. By calculating the time delay, the Arduino can determine the distance to the closest object directly in front of the sensor.
What is the role of the servo motor in the DIY radar project?
The servo motor is used to rotate the ultrasonic sensor, allowing it to scan a wider area. By rotating the sensor and measuring distances at various angles, the system can create a more comprehensive map of its surroundings, similar to how a radar works.
Can I use any Arduino board for this project?
You can use most Arduino boards for this project, such as the Arduino Uno, Nano, or Mega. The choice depends on the available pins and your specific needs. The Arduino Uno is commonly used due to its popularity and ease of use.
How can I control the rotation speed and angle of the servo motor with Arduino?
You can control the servo motor's rotation speed and angle using the Arduino's PWM (Pulse Width Modulation) pins. By sending specific pulse widths, you can instruct the servo to move to a desired angle. Libraries like the Servo library simplify this process.
What are some applications of a DIY radar system?
A DIY radar system can be applied in various scenarios, such as obstacle detection for robots, parking assistance in cars, and environmental monitoring. It can also be used for simple security systems or for fun projects like creating a simple game with object detection.
Related deep dives
Similar reads based on topic and creator.




Recent articles
Fresh deep dives from the latest Reels we unpacked.




Comments
Be the first to comment.