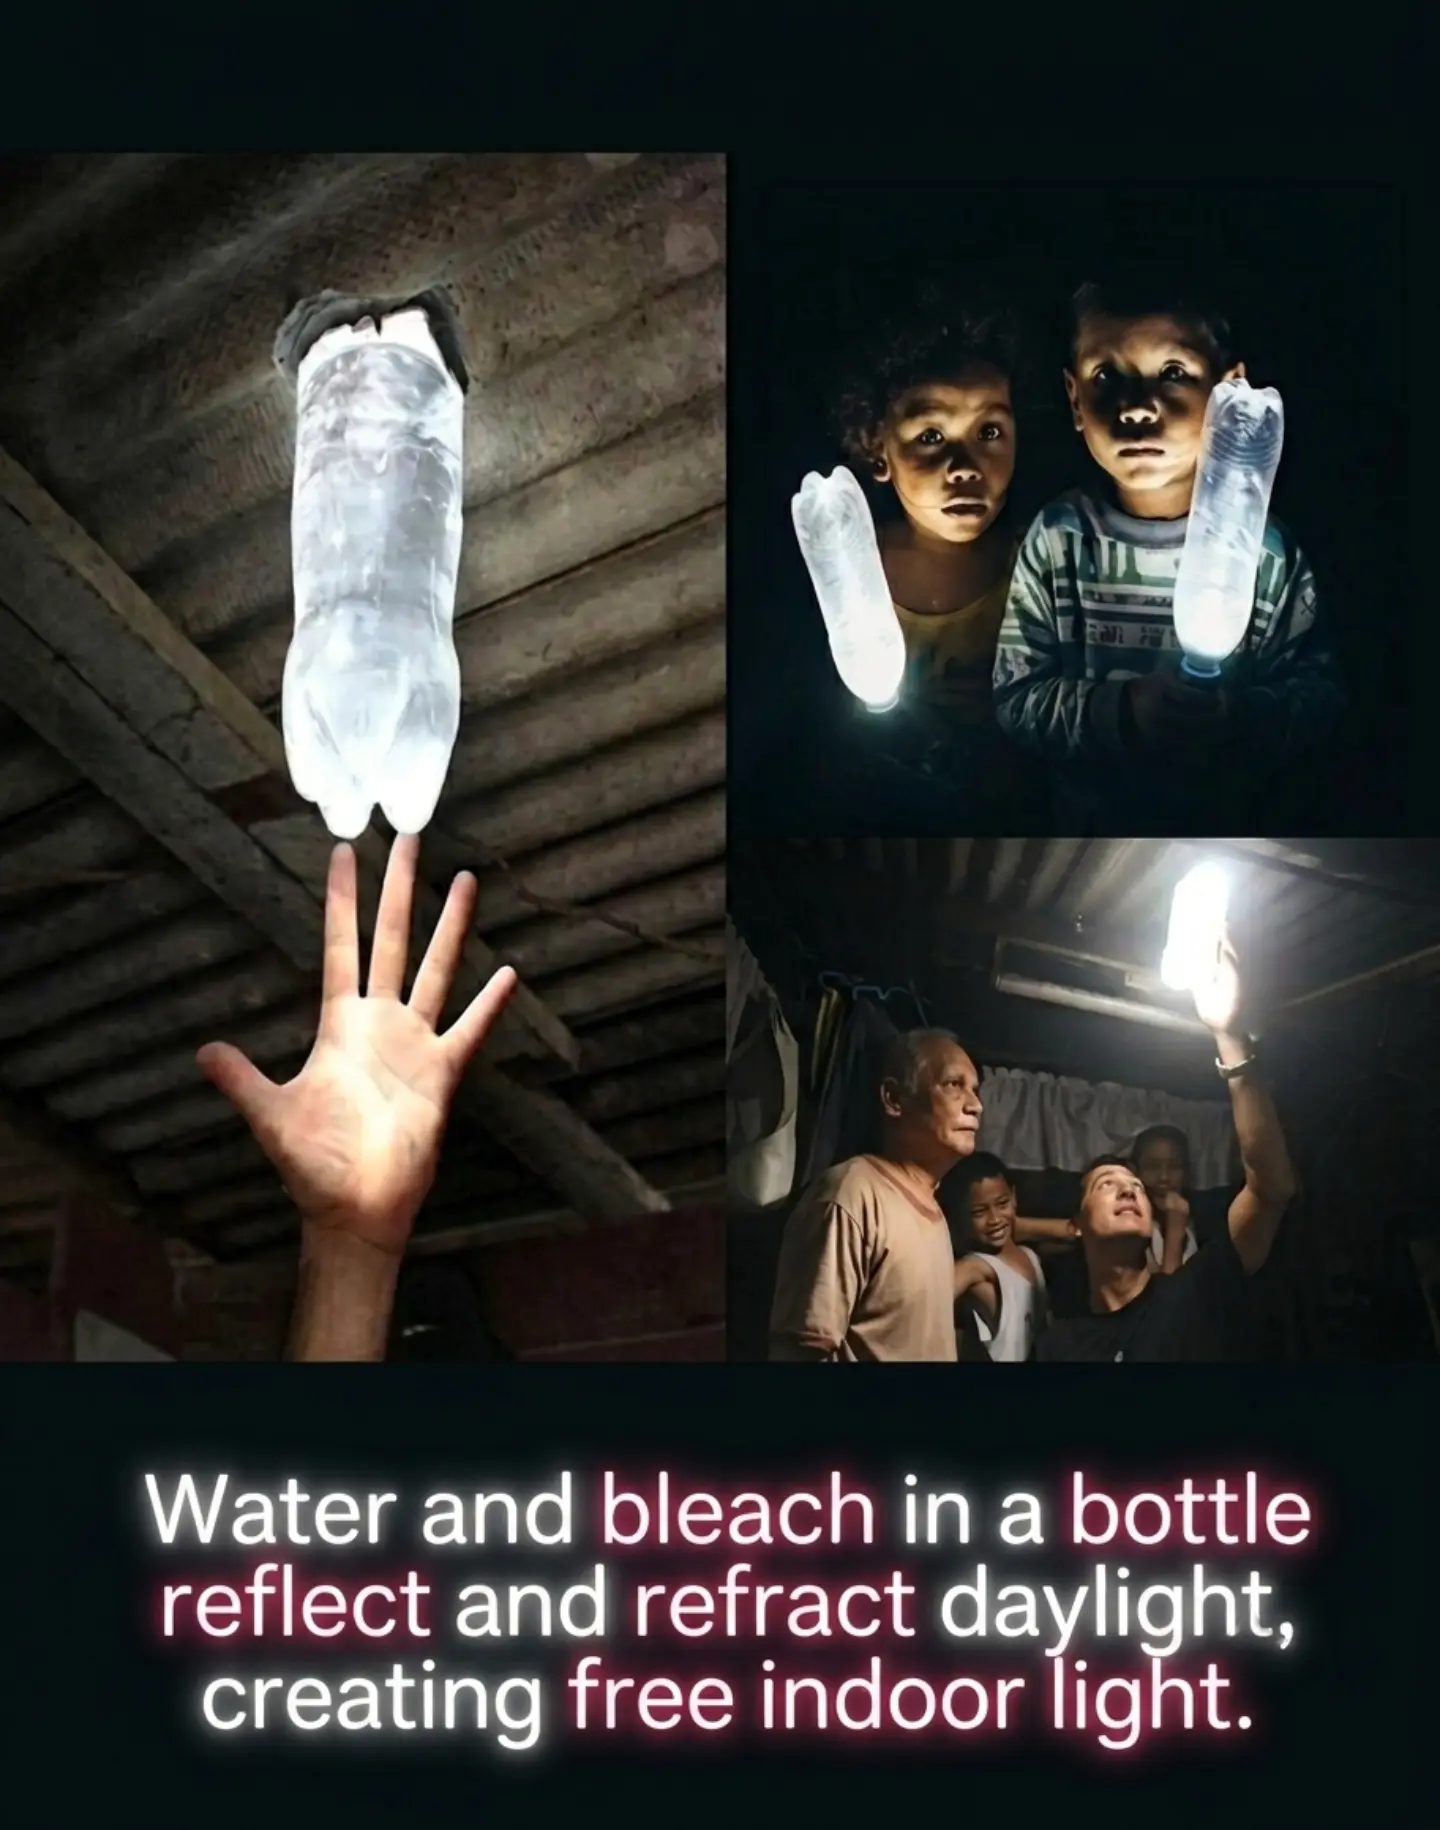
DIY Indor Lighting with a Bottle, Water and Bleach
Indoor lighting is a challenge in communities without reliable access to electricity. However, a clever, low-cost solution, popularized by initiatives like Liter of Light, uses a plastic bottle, water, and bleach to create a sustainable lighting source. This DIY "solar bulb" is not only eco-friendly but also cost-effective, making it an ideal solution for energy-poor areas.
Context: The Challenge of Indoor Lighting
In many parts of the world, access to electricity is limited or non-existent, making indoor lighting a significant challenge, especially during the day. Traditional lighting solutions often rely on electricity, which can be costly and environmentally damaging. The DIY solar bulb provides a practical alternative that harnesses the power of the sun to illuminate indoor spaces.
Main discussion
The Setup
The DIY indoor lighting solution is straightforward and requires minimal materials:
- A clean, clear plastic bottle
- Water
- A small amount of bleach
The bottle is filled with water and a splash of bleach. The bleach serves a critical purpose: it prevents the growth of algae, keeping the water clear and allowing the "bulb" to function effectively for years.
The Installation
To install the DIY solar bulb, follow these steps:
- Create a Hole: Make a hole in the roof of the structure, ensuring it is just large enough to fit the bottle snugly.
- Position the Bottle: Place the bottle into the hole so that the top half is outside and the bottom half is inside the home. This positioning allows the top half to catch sunlight while the bottom half illuminates the indoor space.
- Secure the Bottle: Ensure the bottle is securely fixed in place to prevent it from falling or moving, which could disrupt the lighting.
The Science Behind the Lighting
The magic of this DIY lighting solution lies in the science of light refraction and reflection. Here's how it works:
- Refraction: When sunlight hits the water in the bottle, it is refracted, or bent, in all directions. This scattering of light illuminates the entire room, providing a soft, natural light.
- Reflection: The water in the bottle also reflects the sunlight, further amplifying the lighting effect. This combination of refraction and reflection creates a brightness equivalent to a 55-watt bulb.
Benefits of the DIY Solar Bulb
The DIY solar bulb offers several benefits, making it an attractive solution for communities with limited access to electricity:
- Cost-Effective: The materials required are readily available and inexpensive, making this solution accessible to everyone.
- Sustainable: By harnessing sunlight, this lighting method is eco-friendly and does not contribute to carbon emissions.
- Easy to Install: The installation process is simple and can be completed with basic tools and materials.
- Long-Lasting: The addition of bleach prevents algae growth, ensuring the water stays clear and the lighting solution remains effective for years.
Practical Tips
Here are some practical tips to ensure the success of your DIY solar bulb:
- Choose the Right Bottle: Opt for a clear, plastic bottle that is sturdy and free from scratches or discoloration. A standard 1.5-2-liter bottle works well for this purpose.
- Use the Correct Amount of Bleach: Add a small amount of bleach to the water—about a capful—for every liter of water. This will prevent algae growth without overpowering the scent.
- Ensure Proper Sealing: Make sure the bottle is securely fixed in the roof to prevent leaks or movement, which could compromise the lighting effect.
- Position the Bottle Correctly: The top half of the bottle should be outside to catch as much sunlight as possible, while the bottom half should be inside to illuminate the room effectively.
Important Takeaways
- Simplicity Meets Effectiveness: This DIY solution showcases how simple, readily available materials can create an effective lighting solution.
- Environmental Benefits: By using natural light, this method reduces reliance on electricity, contributing to a smaller carbon footprint.
- Community Impact: Initiatives like Liter of Light demonstrate how innovative solutions can significantly improve the quality of life in energy-poor areas.
Conclusion
The DIY solar bulb is a testament to human ingenuity and the power of simple, sustainable solutions. By using a plastic bottle, water, and bleach, communities can bring daylight into their homes, reducing reliance on electricity and improving overall well-being. This low-cost, eco-friendly lighting solution is a practical example of how innovation can address real-world challenges, making a tangible difference in the lives of people in energy-poor areas.
Questions readers ask
How does a DIY solar bulb made from a plastic bottle work?
The DIY solar bulb works by refracting daylight through a plastic bottle filled with water and a small amount of bleach. The bottle is installed in a roof, catching sunlight during the day and dispersing it into the room below, effectively brightening indoor spaces.
What type of plastic bottle should I use for the DIY solar bulb?
A clear, 1.5-liter to 2-liter plastic bottle works best for this project. Ensure the bottle is clean and free from any labels or residue that could obstruct the light.
Why is bleach added to the water in the bottle?
Bleach is added to prevent the growth of algae and mold within the bottle, which could otherwise obscure the light over time. The slight amount of bleach added also helps maintain the clarity of the water by killing bacteria.
How long does a DIY solar bulb typically last?
With proper installation and maintenance, a DIY solar bulb can last for several years. The durability of the bulb depends on the quality of the plastic bottle used and the environmental conditions where it is installed.
Can the DIY solar bulb be used in any type of roof?
The DIY solar bulb can be installed in most types of roofs, including those made of metal, tin, and thatch. The key is to ensure the bottle is securely fitted and waterproofed to prevent leaks and maximize the amount of sunlight that can enter the room.
Is the DIY solar bulb effective in areas with limited sunlight?
The effectiveness of the DIY solar bulb can vary depending on the amount of sunlight available. In areas with limited sunlight, the bulb may not provide as much light as in sunnier regions, but it can still offer some illumination, especially in smaller rooms.
Can the DIY solar bulb be used as the sole lighting source in a room?
While the DIY solar bulb can significantly brighten indoor spaces during the day, it is generally not sufficient as the sole lighting source, especially in larger rooms. It is best used as a supplementary lighting solution to enhance natural light.
Related deep dives
Similar reads based on topic and creator.



Recent articles
Fresh deep dives from the latest Reels we unpacked.




Comments
Be the first to comment.