Creating a Simple N8N Automation for Sending Cold Emails
Automating workflows can significantly enhance productivity, especially when dealing with repetitive tasks like sending cold emails. N8N, a powerful workflow automation tool, allows you to create complex workflows with ease. In this guide, you'll learn how to set up a simple N8N automation that sends personalized cold emails using Google Sheets and an AI agent. By the end, you'll have a clear understanding of how to trigger actions based on events in one app and perform actions in another.
Why This Matters
Automating cold email campaigns can save time and ensure consistency in your outreach efforts. By integrating Google Sheets with N8N and an AI agent, you can streamline the process of sending personalized emails to a large number of recipients. This approach not only increases efficiency but also allows for scalability, making it easier to manage larger email lists.
Setting Up the N8N Workflow
Before diving into the steps, it's important to understand the basic structure of an N8N workflow. Every workflow consists of a trigger and an action. The trigger initiates the workflow when a specific event occurs, and the action is the task performed as a result of the trigger.
For this tutorial, the trigger will be adding an email ID to a Google Sheet, and the action will be sending a personalized cold email to that email ID.
Step 1: Creating the Trigger
-
Sign Up and Prepare Your Tools
- Sign up for an N8N account, which offers a 14-day free trial.
- Prepare a Google Sheet with your email database.
-
Create a New Workflow
- Once inside the N8N platform, click on "Create Workflow."
-
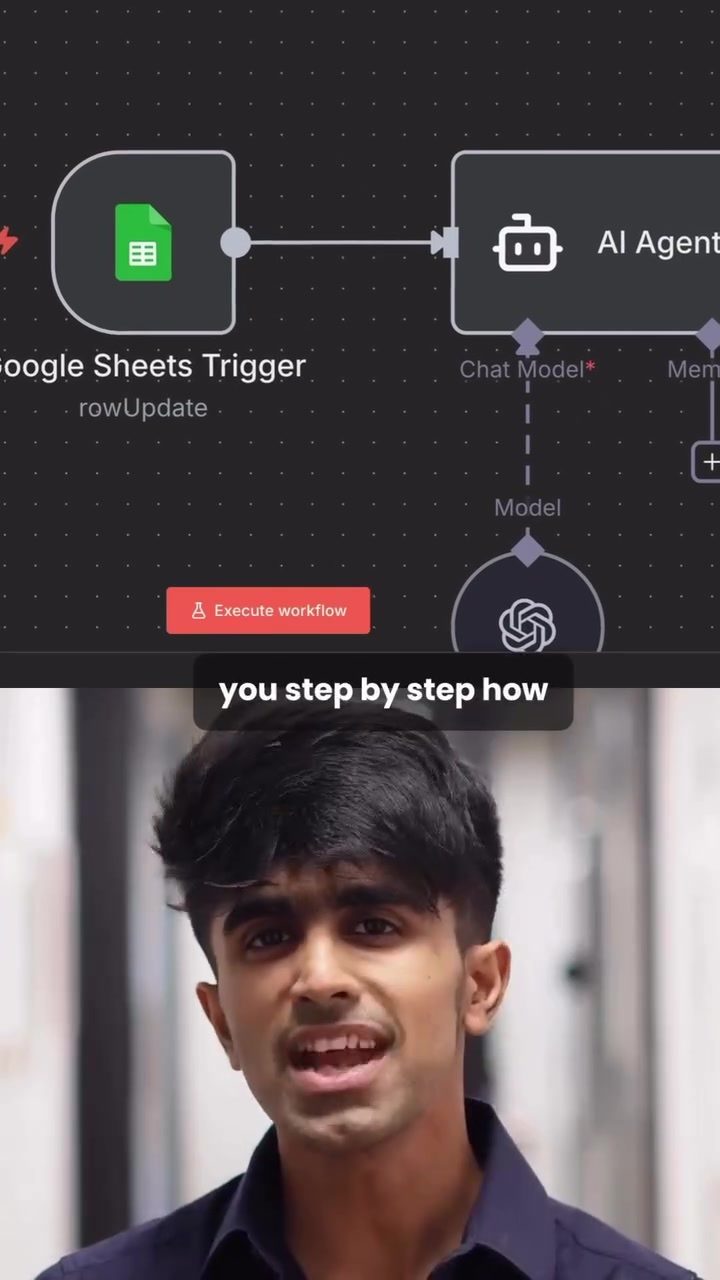
Add a Google Sheets Node
- Add a new node and select Google Sheets.
- Connect your Google account by adding your credentials. This will allow N8N to access your Google Sheets.
- Choose the sheet that contains the email IDs and select the specific tab if needed.
- Click on "Fetch Event" to test the connection. You should see the data coming in from the sheet on the left side.
Step 2: Calling an AI Agent
-
Connect to an AI Agent Node
- Connect the Google Sheets node to an AI agent node. This node will handle the creation of personalized email content.
- The AI agent has three parts: model, memory, and tool. Double-click the AI agent node to configure it.
-
Configure the AI Agent
- In the system prompt, tell the AI agent what it should do. For example, you can say, "You are a helpful email assistant. Write an email without a subject line."
- In the user message, write something like, "Write a message starting with 'Dear,' and drag the name from the left side variable panel so the email becomes personalized for each contact."
- Under the model section, select OpenAI. This will generate the email content using OpenAI's capabilities.
Step 3: Drafting the Email
- Generate the Email Draft
- Execute the AI agent node and check the output. This is your final email draft generated by the AI.
Step 4: Setting the Action
- Connect to a Gmail Node
- Connect the output of the AI agent node to a new Gmail node. This node will handle sending the email.
- Select "Send Message" as the action.
- Choose the Gmail account you want to send from and drag the email variable from the left side panel to the "To" field. This tells N8N to send the email to every email ID in your sheet.
- Personalize the subject line by writing something like "Inviting you to [Your Offer]" and dragging the relevant variable.
- For the message body, drag the AI agent's output. This ensures that the email content generated by OpenAI is included in the email.
Step 5: Executing the Workflow
- Test the Workflow
- Click on "Execute Workflow" to test it. You'll see a spinning circle on each node, and when it turns green, that means the node has executed successfully.
- Check your inbox or outbox to see that the emails have been sent with personalized content.
Practical Tips
-
Test Each Step Individually
- Before running the entire workflow, test each node individually to ensure that data is flowing correctly between them.
-
Use Variables Wisely
- Make sure to use variables correctly to personalize your emails. Dragging variables from the left side panel ensures that each email is tailored to the recipient.
-
Monitor the Workflow
- Regularly monitor the workflow to ensure that it is running smoothly. Check for any errors or issues that may arise and address them promptly.
-
Optimize for Efficiency
- As you become more comfortable with N8N, explore additional features and integrations to optimize your workflows further.
Important Takeaways
-
Understand the Basics
- Every N8N workflow is made of a trigger and an action. Understanding this basic structure is crucial for creating effective workflows.
-
Leverage AI for Personalization
- Using an AI agent to generate personalized email content can significantly enhance the effectiveness of your cold email campaigns.
-
Utilize Integrations
- N8N's ability to integrate with various apps and services makes it a powerful tool for automating complex workflows.
Conclusion
Creating a simple N8N automation to send cold emails can streamline your outreach efforts and save valuable time. By following the steps outlined in this guide, you can set up a workflow that triggers an email sent action based on updates in a Google Sheet. Whether you're a marketer, salesperson, or entrepreneur, this automation can help you reach a larger audience with personalized messages efficiently.
Questions readers ask
What is N8N and how can it help with cold email automation?
N8N is a workflow automation tool that enables users to connect various apps and services to create automated workflows. For cold email campaigns, N8N can help by triggering email sends based on specific events, such as new rows in a Google Sheet, and integrating with AI agents for personalized messaging.
How can I use Google Sheets with N8N for cold email campaigns?
To use Google Sheets with N8N for cold email campaigns, you can set up a workflow where N8N is triggered by new or updated rows in a Google Sheet. This can include recipient details and other relevant information. N8N can then use this data to send personalized cold emails through an integrated email service.
What is an AI agent and how does it enhance cold email automation in N8N?
An AI agent in the context of N8N workflows is a tool that uses artificial intelligence to generate personalized content for cold emails. By integrating an AI agent, you can enhance your cold email campaigns by automatically creating tailored messages for each recipient, improving engagement and response rates.
How do I create a trigger for cold email automation in N8N?
To create a trigger for cold email automation in N8N, you typically start by selecting a trigger node that responds to specific events, such as a new row in Google Sheets. Once the trigger is set, you can configure it to activate the workflow, which then proceeds to send personalized emails using the data from the Google Sheet.
Can N8N handle personalized content for each recipient in a cold email campaign?
Yes, N8N can handle personalized content for each recipient by integrating with an AI agent or using data from a Google Sheet. You can set up your workflow to include placeholders that N8N replaces with recipient-specific information, ensuring that each email is tailored to the individual recipient.
What are the benefits of automating cold email campaigns with N8N?
Automating cold email campaigns with N8N offers several benefits, including time savings, consistency in messaging, and the ability to scale your outreach efforts. By automating the process, you can focus on other aspects of your business while ensuring that your emails are sent out promptly and personalized to each recipient.
Related deep dives
Similar reads based on topic and creator.




Recent articles
Fresh deep dives from the latest Reels we unpacked.



Comments
Be the first to comment.