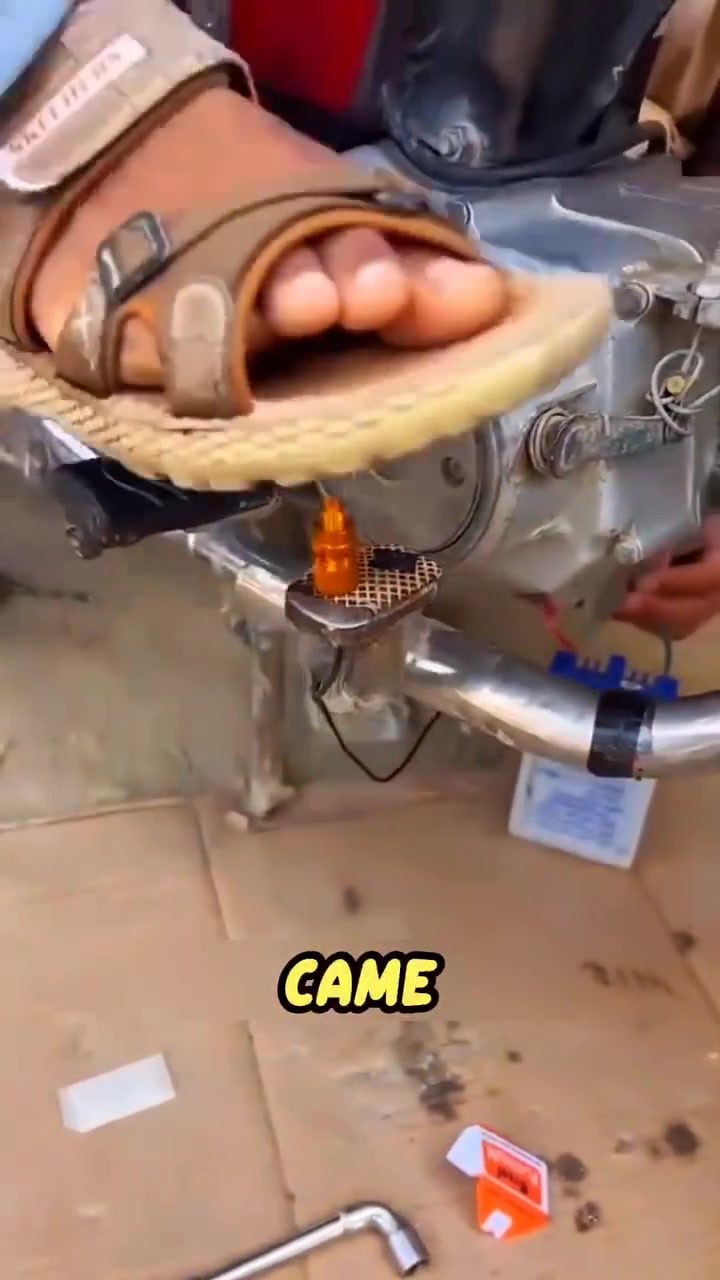
Motorcycle Brake Light Repair
Motorcycle enthusiasts often look for innovative ways to enhance their bikes, and one such ingenious solution involves creating a brake light switch using a razor blade. This unconventional method not only adds a functional brake light but also showcases the creativity and resourcefulness of the DIY community.
Why This Matters
A functional brake light is crucial for safety, as it signals to other drivers that the motorcycle is slowing down or stopping. While many motorcycles come with built-in brake lights, custom or older models might require additional modifications. This DIY approach provides a cost-effective and creative solution for riders who want to add or upgrade their brake light system.
Understanding the Basics
The Components
Before diving into the process, it's important to understand the key components involved:
- Brake Pedal: The part that the rider presses to apply the brakes.
- Wire: Conductive material used to transmit electrical signals.
- Razor Blade: A sharp, thin piece of metal that will be repurposed.
- Bolt and Washers: Fittings to secure the brake light switch.
- Lighter: A tool to heat the razor blade for shaping.
The Creative Steps
Drilling the Pedal
The process begins with drilling a small hole in the brake pedal. This hole will allow a wire to be threaded through, connecting to the brake light switch mechanism. The drill must be precise to ensure the wire fits snugly and doesn't interfere with the pedal's movement.
Securing the Wire
Once the hole is drilled, a wire is threaded through it. This wire will eventually connect to the razor blade, which acts as the switch. The wire is secured in place with a bolt and washers, ensuring it remains firmly attached to the pedal.
Preparing the Razor Blade
The razor blade is the key component in this DIY project. First, the blade is stripped of its non-conductive coating. Two wires are then connected to the opposite ends of the blade, creating a simple electrical switch. The innovative part of this process involves heating the blade with a lighter until it's red hot. While the blade is still soft, it's pressed onto the fuel hose, shaping it perfectly to match the hose's curve. This ensures the blade fits seamlessly into the motorcycle's existing structure.
Testing the Setup
With all the components in place, it's time to test the brake light switch. As soon as the rider steps on the brake pedal, the small brake light instantly turns on. This confirms that the DIY brake light switch is functional and ready for use. The process demonstrates that a few simple parts and a bit of creativity can result in a working brake light switch from scratch.
Practical Tips
Safety First
When working on your motorcycle, always prioritize safety. Wear protective gear, including gloves and safety glasses, especially when handling sharp objects like razor blades and hot surfaces.
Use the Right Tools
Having the right tools is crucial. Ensure you have a drill, bolts, washers, and a lighter. Precision tools will make the process smoother and more accurate.
Test Thoroughly
After completing the installation, test the brake light switch thoroughly. Make sure it activates consistently when the brakes are applied. Safety is paramount, and a reliable brake light is essential for safe riding.
Consider Legal Requirements
Depending on your location, there may be legal requirements for motorcycle modifications. Ensure that your DIY brake light switch complies with local regulations to avoid any legal issues.
Important Takeaways
Resourcefulness Pays Off
This DIY project highlights the importance of resourcefulness and creativity in motorcycle repairs. With a few common items and some ingenuity, you can create a functional and reliable brake light switch.
Custom Solutions
Custom modifications can enhance both the functionality and aesthetics of your motorcycle. This project is a great example of how you can tailor your bike to your specific needs and preferences.
The Value of DIY
DIY projects not only save money but also provide a sense of accomplishment. By building your own brake light switch, you gain a deeper understanding of your motorcycle's mechanics and can take pride in your handiwork.
Conclusion
Adding a brake light switch to your motorcycle using a razor blade is a creative and cost-effective solution. This project showcases the DIY spirit and the resourcefulness of motorcycle enthusiasts. With a few simple parts and a bit of creativity, you can enhance the safety and functionality of your bike. Always prioritize safety and ensure that your modifications comply with local regulations.
Questions readers ask
What type of razor blade is recommended for a DIY motorcycle brake light switch?
A single-edge razor blade is typically recommended for this project. Ensure the blade is clean and free of any debris before use. The blade should be thin and flexible enough to fit within the brake lever mechanism.
Can this DIY brake light switch be installed on any type of motorcycle?
This DIY brake light switch can be installed on most motorcycles, but it's important to ensure compatibility with your specific model. Custom or older bikes may require additional modifications. Always check your bike's specifications and brake lever design to confirm feasibility.
What tools are needed to create a razor blade brake light switch?
For this project, you will need a single-edge razor blade, electrical wire, soldering iron, heat shrink tubing, wire cutters, and a multimeter. Additionally, basic hand tools like screwdrivers and pliers may be required for accessing and modifying the brake lever mechanism.
How does a homemade brake light switch enhance motorcycle safety?
A functional brake light is vital for signaling to other drivers that the motorcycle is slowing down or stopping. This DIY brake light switch ensures that the brake light activates reliably, reducing the risk of accidents and enhancing overall safety.
What are the benefits of using a razor blade for a custom brake light system?
Using a razor blade for a custom brake light system offers several benefits, including cost-effectiveness and ease of installation. Razor blades are readily available and inexpensive, making this a budget-friendly option for motorcycle enthusiasts.
Can the DIY brake light switch be integrated with an existing brake light system?
Yes, the DIY brake light switch can be integrated with an existing brake light system. This involves connecting the new switch to the existing wiring, ensuring that the brake light activates when the brake lever is engaged. Proper wiring and testing are essential for a seamless integration.
What precautions should be taken when working on a motorcycle brake light modification?
When working on a motorcycle brake light modification, always ensure the bike is turned off and the battery is disconnected to prevent electrical hazards. Wear appropriate safety gear, such as gloves and safety glasses, and follow the manufacturer's guidelines for any modifications.
Recent articles
Fresh deep dives from the latest Reels we unpacked.



Comments
Be the first to comment.