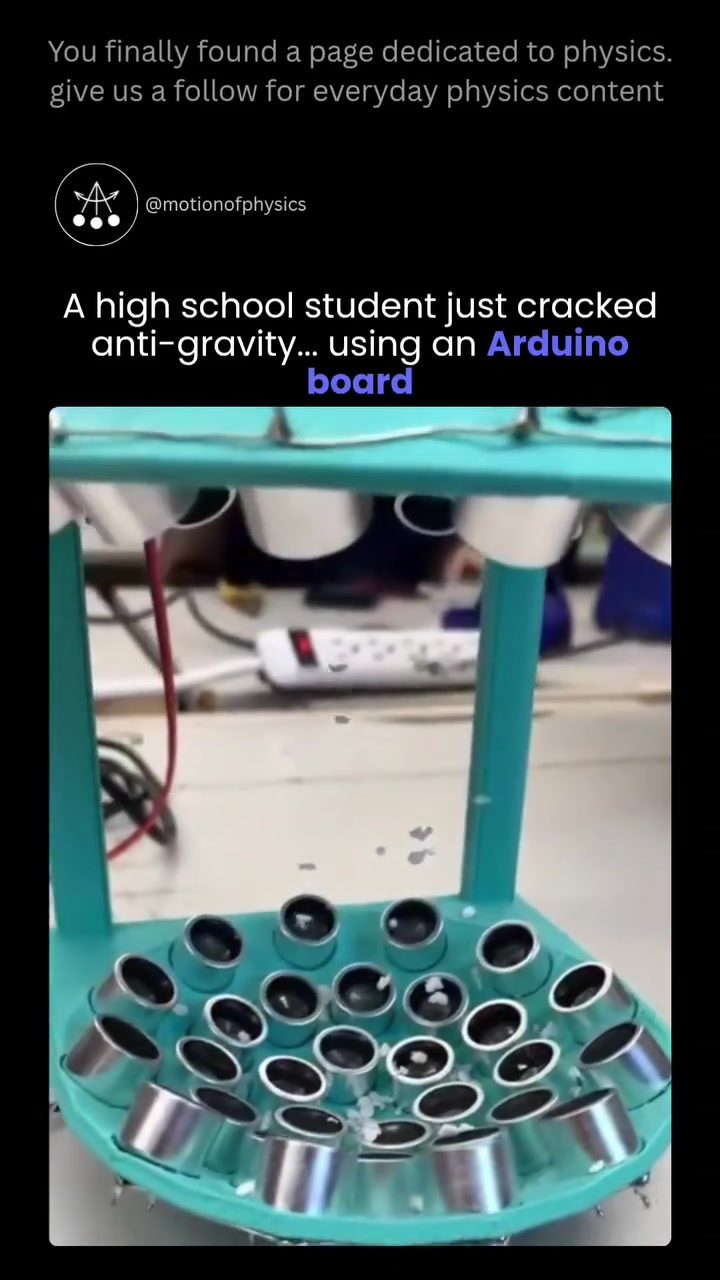
Acoustic Levitation with Arduino
Acoustic levitation is a fascinating phenomenon that utilizes sound waves to manipulate small objects, seemingly defying gravity. This technology has wide-ranging applications, from material handling to biological research, and can be explored using an Arduino board to control ultrasonic transducers.
Acoustic levitation leverages the power of sound to create forces that counter the effects of gravity. This process begins with an Arduino board, which controls arrays of ultrasonic transducers. These transducers are positioned above and below a small chamber, emitting high-frequency sound waves. The key to this process lies in the interference patterns created by these sound waves. When the waves intersect, they form a standing wave with regions of different acoustic pressure. The areas of high pressure in these standing waves can trap tiny, lightweight particles, causing them to hover in mid-air despite the pull of gravity.
Why This Matters
The ability to manipulate particles without physical contact has significant implications for various fields. Traditional methods of handling materials often involve direct contact, which can lead to contamination or damage. Acoustic levitation offers a non-contact solution, making it ideal for sensitive applications such as chemical experiments and biological sample handling. This technique can also be used in industries that require precise control over small particles, such as pharmaceuticals and microelectronics.
Setting Up the Acoustic Levitation Experiment
Understanding the Components
To set up an acoustic levitation experiment, you need a few key components:
- Arduino Board: The brain of the operation, controlling the ultrasonic transducers.
- Ultrasonic Transducers: Devices that emit high-frequency sound waves.
- Chamber: A small, enclosed space where the particles will be levitated.
- Power Supply: To ensure the Arduino and transducers receive adequate power.
Positioning the Transducers
The position of the transducers is critical. They are typically arranged in arrays above and below the chamber to create a balanced field of sound waves. This setup ensures that the interference patterns are symmetric, allowing for stable levitation.
Emitting Sound Waves
The ultrasonic transducers emit high-frequency sound waves, usually in the range of 20 kHz to 40 kHz. These waves are carefully controlled to create a standing wave pattern. The interference of these waves results in regions of high and low pressure, known as nodes and antinodes. These regions are key to levitation, as the particles become trapped at the stable points within the sound field.
Practical Tips for Successful Acoustic Levitation
Choosing the Right Particles
The particles used in acoustic levitation must be lightweight and small. Ideal candidates include powders, droplets, or other fine materials. The size and weight of the particles will affect how well they levitate, so experimentation with different materials can yield the best results.
Optimizing the Sound Field
Creating a uniform and stable sound field is essential for successful levitation. Adjust the position and power of the transducers to achieve the desired interference pattern. The frequency and amplitude of the sound waves can be fine-tuned to improve the effectiveness of the levitation.
Ensuring Stable Conditions
Environmental factors such as temperature and humidity can affect the performance of the levitation system. Maintain a consistent environment to ensure stable conditions and reliable results.
Important Takeaways
Acoustic levitation is a powerful tool for manipulating particles without direct contact. By using an Arduino board and ultrasonic transducers, you can create a controlled environment where sound waves balance gravitational forces, allowing particles to levitate. This technique has wide-ranging applications in various fields, from materials handling to biological research, offering a non-contact solution for precise control over small particles.
Conclusion
Acoustic levitation using an Arduino board and ultrasonic transducers is a remarkable demonstration of how sound waves can exert real forces on matter. This technique offers numerous benefits, including the ability to handle materials without direct contact, making it ideal for sensitive applications. Whether you're a high school student or a professional researcher, exploring acoustic levitation can provide a deeper understanding of the hidden forces shaping our physical world.
Questions readers ask
What is acoustic levitation and how does it work?
Acoustic levitation is a technique where sound waves are used to make small objects float, seemingly defying gravity. An Arduino board controls ultrasonic transducers which emit high-frequency sound waves, creating a standing wave with regions of high and low pressure that can levitate small particles.
What components are needed to create an acoustic levitation device?
To create an acoustic levitation device, you'll need an Arduino board, ultrasonic transducers, and a small chamber. The Arduino board controls the transducers, which are positioned above and below the chamber to emit sound waves that levitate small objects.
What are the applications of acoustic levitation?
Acoustic levitation has a variety of applications, especially in fields that require precise, non-contact manipulation. These include material handling, biological research, and even drug delivery systems. It's also a great tool for high school science projects and demonstrations.
How does an Arduino board help in controlling the levitation process?
An Arduino board acts as the control center for the levitation process. It sends signals to the ultrasonic transducers, controlling the frequency and amplitude of the sound waves emitted. This precise control is crucial in creating the standing waves required for levitation.
Can a high school student create an acoustic levitation device for a science project?
Yes, a high school student can create an acoustic levitation device for a science project. With some basic knowledge of electronics and programming, along with the right components, a student can build a simple levitation device to demonstrate the principles of sound wave technology.
What safety precautions should be taken when working with ultrasonic transducers?
When working with ultrasonic transducers, it's important to be aware of the high-frequency sound waves they emit, which can be harmful to human hearing. Always operate the device with proper precautions, such as wearing ear protection and keeping the device away from people. Also, avoid direct contact with the transducers when they are in operation.
How can the levitation height be adjusted in an acoustic levitation device?
The levitation height can be adjusted by changing the frequency of the sound waves emitted by the ultrasonic transducers. By altering the frequency, the standing wave pattern changes, allowing objects to levitate at different heights within the chamber. This can be easily controlled using the Arduino board.
Related deep dives
Similar reads based on topic and creator.




Recent articles
Fresh deep dives from the latest Reels we unpacked.




Comments
Be the first to comment.